Creating Coupons
To add a coupon, go to Event Dashboard >> Financial >> Coupons >> Add a Coupon. Enter a name for your coupon. You can actually create multiple coupons at once by typing them all into the field and separating them with whitespace or commas. (All coupon names should be one word, with no spaces).
Select start and end dates (or just a start date if it will not expire). For the discount, add either a percentage or a dollar amount. You can also add both to create a formula (for example, 10% plus $2 off). Select a Coupon Pool from the dropdown at top right.

Advanced Options
Select the Advanced Options dropdown to add more conditions and settings to your coupon code. All of these settings are optional. You can start by selecting the costs and fees that your coupon covers. You can also require a minimum cart total (like $100). You can set a number of total uses, the number of total tickets on which it can be used, and a total number of tickets it can be applied to in any one transaction.

If you want your coupon to apply only to certain ticket groups or levels, select them at the bottom of the page.

You can add tags and notes to coupons as well.
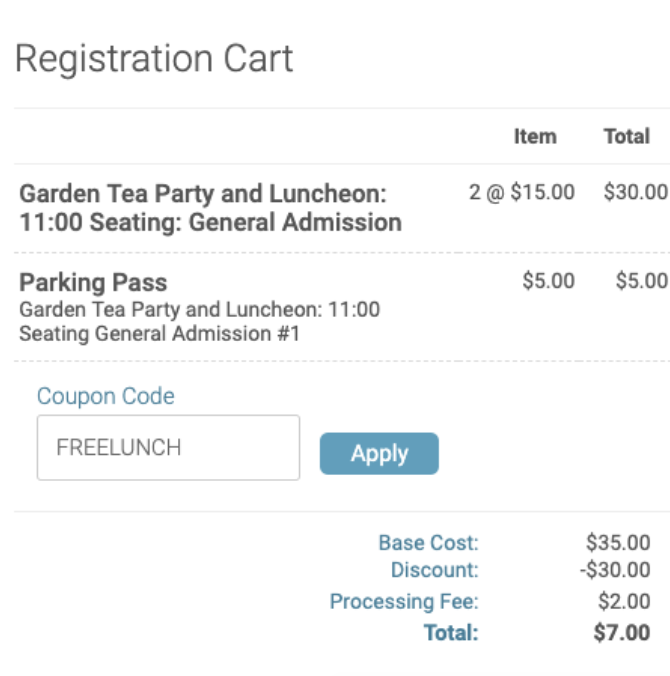
Applied Coupon Example
This is what they payment screen looks like after a coupon has been applied.

Was this article helpful?
That’s Great!
Thank you for your feedback
Sorry! We couldn't be helpful
Thank you for your feedback
Feedback sent
We appreciate your effort and will try to fix the article